Tuesday, May 21, 2013

A Bike For Mom

     A lot in this blog thus far has been about my dad, and my relationship and similarities with him.  But, when talking about bicycles and my family, you shouldn't leave out my mom.  She was right there running the bike shop, undeniably fulfilling the more difficult tasks of finances, dealing with vendors and helping the public.  My dad, as talented and skilled as he was, spent a lot of time between closed doors.  Outside of the shop, my mom was a tenacious mountain biker, taking to the trails of Pisgah National Forest nearly every morning. She had several riding buddies who accompanied her on her rides, and even branched out from mountain biking (something my dad never did) and completed a century ride: the Hilly Hellacious in Asheville, North Carolina.

The patch my mom got for the Hilly Hellacious century ride in 1994.  Taken on May 11, 2013
     But by the late '90's my mom got away from cycling.  The closing of our family bike shop forced her to seek full-time employment, and that strain in addition to raising my brother and I eventually took her away from the saddle for good.
     For a few years now my mom has been wanting to get a new bike so that she can "get back into it".  In the interest of her health she's already made some significant changes to her diet and the next step is exercise.  Nothing felt more natural than getting a new bike.  Having recently moved to the Playa Del Ray neighborhood in Los Angeles, she was wanting to get a beach cruiser to hit the nearby bike paths that line the world famous beaches of Los Angeles.  We discussed the sort of bike that would be best for her and quickly settled on a bike which would be internally geared.
Exploded view of a
Sturmey-Archer three
speed hub.  Source
     When most people think of a bike with different gears, they are probably thinking of an externally derailed bike.  This means that the chain is moved from one cog or sprocket to another via a derailleur, which is a mechanism that does exactly what it sounds like it does:  it derails the chain to a new position.  An internally geared hub, on the other hand, has all of the "shifting built into the hub", to use a phrase I often tell customers.  A very watered down explanation of how it works is that a shifter-controlled "clutch" inside of the mechanism transfers the energy created by the pedaling cyclist between three different planetary gearing  configurations which changes the output ratio.  For the common three speed internally geared hubs, there is usually an "underdrive" low gear, a "direct drive" middle gear, and an "overdrive" high gear.
     Only within the past week have I seen the inside of an internally geared hub, and its complicated, clock-like inner workings greatly excite me.  I want to get my hands on an old hub so that I can rebuild it and record the process here, eventually lacing it to a wheel and using it on a casual bike I am planning in my head.  More on that will come, eventually.
     Internally geared hubs are great for several reasons, and somewhat limiting for a few other reasons.  All of the shifting, mechanical movement and delicate parts are completely sealed from the outside world and the elements.  In general, they require very little maintenance, if any at all.  They are also very easy to use, mostly because they can be shifted when the bike is not moving.  This makes them better for stop-and-go urban riding.
     Their drawbacks come from a lack of versatility and a high price.  The most common internally geared hub throughout the ages has been the Sturmey-Archer three speed hub, adorning bikes since the beginning of the twentieth century.  In the past few decades, the three speed hub has budded into a five speed hub, grown to seven and eight, and lately blossomed into Shimano's eleven speed Alfine hub and Rohloff's monster fourteen speed hub.  The prices range from the most simple three speed hub retailing between $150 and $200, up to about $1700 to $2000 for one of Rohloff's tricked out hubs.  (These prices are rough estimations.)

Cut-away illustration of the inside of a Rohloff fourteen speed hub.  Don't worry, I don't know how it works either.  Source
     For my mom's potential bike, we talked about me building one up for her, but after more consideration decided to not go that route.  To put it shortly, there would be little to no financial benefits of me building a bike up from scratch for her.  The truth is that the sort of bike my mom was wanting wouldn't really warrant a custom build due to its simplicity.  She was wanting, and needing, a very simple bike.  This didn't require a special configuration, it required functionality.  There's a lot of bikes out there that could fill this niche for her.  A week before Mother's Day, my fiancee Keri and I got time off of work to go visit my mom and brother in Los Angeles.  Bike shopping was of course on the agenda.
     The first few shops we visited were no good, ranging from helplessly useless to too elitist to talk to us.  The next day, while waiting for my mom to pick us up, I got onto Los Angeles' Craigslist on a whim. After much scrolling, something caught my eye:  a brand new bike, with a step-through frame, three speed internally geared, and at a killer price.  A little more investigation revealed it was actually a small bike shop posting, coincidentally in a neighborhood very close to our destination that day, the Aquarium of the Pacific, in Long Beach.  After our day of fun at the aquarium, we set out to find the bike shop.
     We ended up in a business complex, curiously trying to spot anything that would look like a bike shop.  Lo and behold, one of the storage unit-like store fronts was filled with bicycles.  Inside we found an assortment of affordable bikes and a slew of used bikes.  My mom immediately liked the bike I had picked out for her and after some test rides it was sold.

My mom's bike, setup in my brothers's apartment after my check-over.  Taken on May 7, 2013
     The bike is called the Micargi Kuba 3, and it is an inexpensive lady's city bike, outfitted with a Shimano Nexus three speed internally geared hub.  Being what some people call a "city bike", it is a little more utilitarian and capable of urban riding than a cruiser.  Cosmetically it emulates the old English three speed cruisers from the sixties and seventies, especially in the structure of the fork and fenders.  Most of the bike has very inexpensive and low quality parts, but they are fairly functional and, more importantly, could be upgraded easily if the need ever arose.  The wheels are the modern "road bike" size of 700c and the rims are double-walled, which as explained in my earlier wheel-building post makes them substantially stronger than the cheapest rims out there.  The saddle is some cheap knock-off of the older cruiser style, and will likely be replaced sometime soon when it wears out.  The most valuable and important component on the bike is the rear hub.  Everything else can change if necessary.

Left:  Rear of the bike.  It came with a simple rack.
Right:  Fork and fenders.  Note the chromed dimple on the crown of the fork,
 and the shape of the fender:  directly imitating the old English three speeds.
Both taken on May 7, 2013
     I've tried to do some research on Micargi but all I can find are outdated websites.  It seems Micargi mostly produces department store quality bikes.  While parts of my mom's bike hold up to this standard, I'm still surprised by the overall build of the bike.  Maybe it's just the Shimano Nexus hub, but it feels like it is just a hair above the typical department store bike.
     The important thing is that my mom likes her bike.  She took it out for a ride a week after buying it and reported that she loved it.  Hopefully with time she'll outgrow this bike and it can hang around as a good bike for casual rides and strolls through the park.  For Mother's Day I got her the Mirrycle Bicycle Mirror, which just so happens to be the best bicycle mirror ever.  I bought it a few days before our trip, intending it to be a slight nudge to go ahead and get a bike.  Seems it was all meant to work out.
     My parent's divorce was, by most standards, not a bad one and they remained friends.  Somewhere, wherever or whatever my dad is right now, I bet he's happy to see my mom on a bike again.

Hello!  You can't hate the Mirrycle.  Taken on May 7, 2013

Wednesday, April 3, 2013

Happy Birthday, Dad

   Today, being April 3, 2013, is my dad's 49th birthday.  I felt it only appropriate to make a post celebrating the day, and I felt a good tribute would be talking about what was his (and my mom's) most successful business venture:  Pisgah Bike Center.
Pisgah Bike Center in its original location, during the winter.
Date unknown, probably 1995 or 1996
     On May 2, 1992, Pisgah Bike Center was opened for business on 210 East Main Street in Brevard, North Carolina.  Before my parents acquired the lease to the building, it had been a bakery.  I remember scraping off cartoon bats which had been window painted onto the large front windows.  My guess is that it went out of business around Halloween.  I'm not sure what business occupied the building before the bakery, but it was originally an auto shop.  As you can see in the picture above, there were two large garage sections.  The left garage housed my dad's work area, and the garage to the right was storage for bicycles.  The storage garage even had a pit for changing the oil of a car.  A heavy steel grate had been placed over it, and my brother and I would often fish for quarters and other loose change in the bottom of the pit with a long, flexible grabbing tool we borrowed from my dad's toolbox.

My dad at the register of Pisgah Bike Center, before we officially opened.
Date unknown, probably April, 1992
     In the beginning my parents sold Mount Shasta mountain bikes, which were a cheaper, lower quality subset of bikes made by GT Bicycles.  Eventually my parents were able to secure the rights to sell bikes made by GT themselves, along with Balance and ParkPre, and eventually made it into the "big leagues" via Specialized.  They don't make Mount Shasta, Balance, or ParkPre anymore, if that is any indication of how different it was back then.  Our family bike shop was very successful for a lot of reasons.  The most powerful factors were simply that we were in the right place at the right time.  The mountain bike boom of the late 1980's and 1990's was still going strong, and we had moved to the front-line of one of the best mountain biking regions of the eastern United States:  western North Carolina.  Pisgah National Forest in particular is well known as a mountain biking mecca of the East, and Brevard is right on the southeastern edge of the Forest.  When my parents opened Pisgah Bike Center, we were the only bicycle shop in Brevard.  The closest shop was in Asheville, the cultural center of the Blue Ridge Mountains, about thirty miles away.  Add to that mix my parents strong work ethic and enthusiasm for mountain biking, and you have a winner.

Before we officially opened, waiting on bicycles to arrive.  This wall would eventually contain our lineup of bikes to sell.
Date unknown, probably April, 1992
     I have some memories of this time, but they are not especially concrete or clear.  I was, unsurprisingly, not paying that much attention to the bikes or what my parents were doing.  Most of my time was spent playing in a back room where my parents set up a very tiny TV for my brother and I to watch cartoons.  We would venture out to cause a ruckus in the rest of the store from time to time but when things were busy we were usually scooted to the back.

     I only recall my dad trying to show me how to do some work on a bicycle once.  Being seven or eight at the time I guess I was too hyper to sit and learn something, because all I remember is my dad showing me a set of brakes and explaining how you adjust them.  I didn't understand it but I didn't really pay attention either.  I don't know if I was too young or too preoccupied with trivial, boyhood things like video games or the Power Rangers, but I had no interest in learning what my dad did.  That has always been a tremendous fault of mine:  I've always had my head somewhere else, never in the present and never in what I was doing at the time.

     We had the shop at that location for about four years before tragedy struck.  We were leasing the building from an eccentric elderly lady, whose son managed her various properties.  According to my mom, he was very friendly and easy to deal with.  The elderly lady eventually passed away, so the property was passed to the son who was managing it for her anyways.  Then, he unexpectedly passed from a massive heart attack.  At this point, another son of the elderly lady we hadn't known about comes into town from Virginia and claims his inheritance.  Without us knowing, he sold our property to another local business owner who owned a knickknack shop nearby.  They sold things like porcelain unicorns and glass dolphins.  These new owners appeared on our doorstep on my little brother's birthday in 1996.  They were doubling our rent and forcing us to relocating to a temporary trailer so they could demolish our shop to build a strip mall, from which we could then rent space.  My parents rejected this offer and immediately started looking for a new location.  We only had about a month before the new doubled rent would go into effect.

     Unfortunately, the best location my parents could find in time would end up being the first nail in our coffin.  Whereas before we were located downtown in an easy to find building, we were forced to move to a extremely out of the way residential house on one of the state roads going into town.  We were about two miles from the entrance to Pisgah National Forest, but we were also in the middle of the rural countryside.  No one would think to find a bike shop there.

The second location, before my dad turned it into a store.
Left:  Almost every wall you see here was eventually knocked out.  We also pulled up the carpet.
Right:  Taken from the kitchen, which would be my dad's work area.  The dining room type area would become the office.
Date unknown, sometime in 1996
     My dad knocked down a lot of walls and converted the house into the best store that he could.  His work area got much, much smaller, going into what was once the kitchen.  Thinking back, I don't know how he worked in such a small space.  The basement provided a lot of storage, but it was really too much for what we needed.  We were only at this location for about a year before we were forced to close shop for good.  We were losing money quickly and only our most loyal customers would come to our new location.  After a while, even they stopped showing up.  It was a bad time for our family, laced with uncertainty and doubt after a handful of years of uplifting success.  Other bike shops, some in unbeatable locations, started to pop up in Brevard around this time and we could not compete.

     Even today, my mom still harbors resentment towards the people who had malicious parts to play in those events.  She found out later that the plan to push us out of business had been a calculated move, strung up from one black-hearted person to the next in a web of foul play.  A local outfitters store which also dealt in bicycles wanted us out of business, so they used their friendship with the people who underhandedly bought the property we were leasing to drive us out.  According to my mom, a lot of bad things happened to the people involved in that.  Infidelity legal issues, illegal substance abuse and ill-fated business moves came to those people.  I guess the world has a funny way of working itself out sometimes.

My dad's truck, painted up as an advertisement for our store.  Parked in front of the
small duplex we lived in when we first moved to North Carolina.
Date unknown.
     My mom started to work part time for UPS to help the family, eventually venturing into real estate, and after we closed the shop my dad went to work for a former customer who owned a machine shop.  He quickly distinguished himself as one of the best manual machinists there and made quick friends with just about everyone he worked with.  He worked there until we moved to upstate New York in late 1999, and again in 2000 after we moved back to Brevard.  I think of all the "real" jobs my dad had, where he clocked in and was payed by someone else, the job at that machine shop was probably his favorite.

     My dad held onto a few relics from our time as bike shop owners:  small parts and oddities, things that we hauled to New York, and then to North Carolina again, and finally to Indiana when we "returned home". When I embarked on my first backpacking adventure in 2007, my dad fished out what he said was the last ticketed item from Pisgah Bike Center:  a set of sunglass straps, made of blue cord to look like climbing rope, still in its package with one of our price tickets on it.  I took that to the Uintas of northeastern Utah with me, but I didn't end up wearing my sunglasses for more than a few days so I got little use out of the straps.  They actually broke on me near the end of the trip, no doubt because they were over ten years old at that point, but I was fool enough to throw them away when we got home.  A small mistake, I guess.

     My father of course held onto nearly all of his bike tools.  After I started to become a mechanic, I asked if I could have them for my own use and he gave me nearly all of them.  They are now lying in my wooden tool chest, only a few feet from me now.  They are old and most of them worn; some are so depreciated that they don't even make tools in that style anymore.  Not that they are ancient, they are just relics from a time not too long ago.  I will definitely hold onto them for the rest of my life.  Maybe someday I can pass them on, as they were passed to me.  Hopefully at that time, cone wrenches and lock-ring bottom bracket spanners are still relevant.

Tuesday, March 5, 2013

Giant Flying Bicycles

     When I was a kid, between the ages of maybe eight and ten, I was really interested in airplanes.  I often sketched doodles of them on the backs of my worksheets at school, I tried to always read about them in library books, and I was absolutely fascinated by just about anything that flew.  Specifically, World War 2 military aircraft have always been sort of special to me.  Even though I don't really pursue it anymore as an interest, my eyes always light up and my mind starts racing when those kinds of aircraft are brought up.
     Part of this interest was spawned from my dad, whose interest came from his dad.  My grandpa was in the United States Air Force during World War 2.  His enthusiasm for flying carried over into his post-military life, and he has had a lifelong love of aircraft.  My dad and uncles inherited and shared this fascination, which was passed onto me.  It runs in the family, I guess.

     My birthday is nearing, and my lovely fiancee Keri surprised me today with a visit to the Pima Air and Space Museum, a world-class aviation museum right here in Tucson, Arizona.  I was extremely excited, and we had a really fun time.  My boyhood enthusiasm came right out, as I ran from airplane to airplane, telling Keri what I remembered about each one.  When we first entered the museum, we were unsurprisingly greeted with a replica reproduction of the Wright Flyer, the first successful powered aircraft.  Growing up in North Carolina, known as the "First in Flight", I learned about the Wright brothers in elementary school.  They were  bicycle mechanics and frame builders during the great Bicycle Boom of the Victorian Era.  They held patents on some bicycle inventions, and are credited for starting the standard today of left-sided crank arms being reverse-threaded so the pedals do not loosen themselves while pedaling.  That is a very important innovation for the bicycle!
     Although the replica was hung from the ceiling and it was difficult to see the entire thing, I couldn't help but smile as I noticed the bicycle-inspired parts.  Thick sprockets attached to the propellers were driven by what looked like a giant, heavy duty bicycle chain.  On the motor itself, which was a custom-built machine, a more standard-sized chain helped drive the system.  For some reason, and I'm not sure why, I noticed a bare bicycle hub mounted to the front of the canard wings.  The only purpose I can give it is that it assisted in the aircraft taking off from its wooden railed sled.

Left:  A reproduction of the Wright Flyer at the Dayton International Airport.  Source
Right:  A close-up of the bicycle-inspired drivetrain that propelled mankind skyward.  Source
     They used the money they earned from their bicycle business to fund the research and experiments that eventually led to the forefather of all modern aircraft.  Essentially, the airplane was invented by some guys who built and worked on bicycles.  Bicycles and airplanes have always been at least somewhat connected in my mind.  Recently, it has become more concrete to me.  Both are vehicles which were considered radical at their time of conception, paving new roads and opportunities.  For the airplane, it's obvious: man was able to fly in the sky after hundreds of years of yearning to do so.  For the bicycle, perhaps not as obvious:  people were liberated to go greater distances at lesser costs, both financially and physically.
     Both machines are built to be light and efficient, relying on physics to maintain stability, unlike a four-wheeled automobile, which is stable for geometric reasons.  This may seem like the silliest reason, but I think it deserves notice:  aircraft were for the longest time controlled via cables, just likes bicycles.  This is actually still true for smaller aircraft, such as Cessna bush planes.  Strong steel cables run from the controls of the aircraft's cockpit to the various rudders and ailerons that control the aircraft in the sky.  Larger, more modern aircraft, such as jet-powered fighters and civilian airliners, have obviously upgraded to hydraulic systems, just like the bicycle when cable-actuated brakes weren't cutting it for hardcore mountain bikers.  About halfway through our visit, I couldn't help but think that airplanes were just giant flying bicycles.

What I can only guess to be control cables, running along the inside of a B-17 Flying Fortress.  Taken at the Pima Air & Space Museum, March 4, 2013
     We only had a few hours to see the whole museum, as they closed at five o'clock, and we unfortunately entered the one building I unknowingly would have wanted to visit the most dead last.  This hangar housed a B-17 Flying Fortress, this time a plane which is a family favorite, as it was the aircraft my grandpa flew in during World War 2.  But just as we stepped into the cool air, one of the elderly volunteers told us they were closing this building in five minutes, so we had better hurry.  So we rush into the exhibit era, and lo and behold, there is a restored B-17 in all of its glory.  But propped next to a wall exhibit is something that I must admit interested me much more:  an era-specific bicycle!  I had never seen a bike this old so up close before!  As I excitedly kneeled to take pictures, another elderly volunteer came up and told me they were closing in a few minutes, so I should take that time to take pictures of the plane.  I smiled and didn't feel like explaining that I was a bicycle mechanic.  I only had a minute or so to look at it, but it was really cool.

Left:  Front shot of the bike.  It was so interesting to see such an old bike!
Top-right:  Rod-actuated brakes, something that just does not exist anymore unless you're in a developing nation.
Middle-right:  The bottom bracket and crank arm, using the dreaded cotter-pin interface.
Bottom-right:  A Brooks saddle!  Now that assures me I have a quality product.
All taken at the Pima Air & Space Museum, on March 4, 2013
     I had never seen rod-actuated brakes before.  They are a very old precursor to the cable-actuated rim brakes we have today.  These used a solid rod that pulled up on a set of rubber pads, which actually gripped the underside of the bicycle rim instead of the sides like they do nowadays.  The bike was not in the best shape, but it was good enough for me to really enjoy.  Keri pointed out the saddle to me, which was none other than a Brooks leather saddle.  Quite worn and gnarled around the edges, but still very distinguishable, this makes me feel good about my purchase.  If a saddle from the 1940s can at least still bear its shape and resemblance then that is good enough for me.

     Seeing all of the airplanes sparked some strong memories for me too.  In every building, it seemed there was at least one plane that I learned about from my dad.  If it wasn't the SR-71 Blackbird, the current record holder for the fastest manned aircraft propelled by jet technology, it was the PT-19, an aircraft used to train new pilots on how to fly during World War 2, and a plane my dad always seemed to get excited about.  He loved it so much that we actually embarked on one of our first father-son projects, and built a wooden toy plane that we painted with the familiar blue-yellow color scheme.

Left:  The PT-19 on exhibit.  One of my dad's many favorite planes.  Taken at the Pima Air & Space Museum.
Top-right:  The wooden toy plane my dad and I built when I was a kid.
Bottom-right:  A close-up of the plane.  Note the (mostly) similar paint scheme.
All photos taken on March 4, 2013
     I was probably nine or ten years old, and he had just bought a scroll saw; for what exactly, I'm not sure.  But he wanted a project, so he decided he and I would build a little plane.  The fuselage was cut from a piece of pine, probably a two-by-four, and the wings, tail stabilizers and wheel struts were cut from hobby plywood.  I remember my job was to sand everything down to be really smooth, and that I hated doing it.  The propeller was from a model plane, one of those motorized hobby planes that run on a control line as you spin in a circle.  My dad liked playing with those, from time to time.  The most special piece though is the nose cone, a completely custom part that my dad made one night on his tiny lathe in the basement.  He was so proud of it, just a simple, polished piece of what I'm going to guess is steel due to its shine.  The vertical tail fin and the wheel struts were first attached to the fuselage with glued toothpicks, but when those broke he repaired it with cut bicycle spokes.  It seems bicycle spokes solved a lot of his problems.
     A love of airplanes will always be one of the bonds I have with my dad.  I think it transcended the need for any sort of discussion or validation.  It was simple:  we both were just naturally drawn to them.  The same could be said for bicycles, but I honestly think the sentiment runs deeper with airplanes.  Maybe it was because they are sort of mysterious and unattainable.
     I remember my dad briefly wanted to get his pilot's license, but he never got very far with it.  According to my mom, he started reading the books, and went up on an observation flight with a pilot to get a feeling of what he was in for.  After he got back down, I guess he decided he couldn't do it, because it required a lot of reading, written tests, and technical knowledge.  My dad felt his way through everything, just like me, and while you can fly with that sort of skill-set, I don't think it is really encouraged to let novices go up if they don't know exactly what they're doing beforehand.

My dad and his tandem jumper, right after they landed back on the Earth.  This picture
hung on a wall in his house ever since the day he leapt from the plane.
Date unknown, probably summer of 2002.
     Despite this, my dad maintained a lifelong desire to take to the skies.  After our family moved back to Indiana and my parents split up, my dad took to visiting the local airport and watching the skydivers.  He liked to go up into the jump plane and ride back down as the plane tried to beat the plummeting skydivers to the surface.  One day, my dad decided he wanted to join them, and he soon found himself leaping out of the door of an airplane, strapped to an experienced skydiver in a tandem jump.  It was one of my dad's proudest moments, something he had always wanted to do and something he would always be excited to talk about afterwards.  He really loved doing it, although he only did it once; it was a pricey endeavor.  He really wanted me to do it when I was old enough, but I refused.  I enjoy airplanes more as museum pieces, and at least, when safely buckled inside of one.  But maybe someday when I'm in my early forties, that will change.

My entire gallery of the trip to the Pima Air & Space Museum can be found here, on my Facebook profile.  If you ever find yourself in the Tucson era, and you're a fan of aviation, I highly recommend visiting the museum, although I do also recommend to come earlier in the day as our two hour visit was not long enough.

Thursday, February 28, 2013

The Creed of our Forefathers

     An encounter with a customer today at REI where I work prompted me to ponder some things.  An older man came up and asked if I knew anything about bicycles, to which I replied that I knew some.  Heavyset and gruff, he was one of those very straightforward older white men who probably led a successful life by ordering people around.  He told me he had an older "race" bike, which was "very nice", but he was contemplating selling it so he could get a more comfortable bike.  After asking him some questions I figure out he isn't really wanting something built for maximum comfort and that a typical flat bar road bike or performance-oriented hybrid bicycle would do fine for him.
     At this point I ask what I always ask when in this situation:  "Do you like your bicycle?"  Usually I get an affirmative "Yes", to which I then start explaining that you can typically do a lot to a bicycle to help it fit your needs, and that even if a lot has to be done, it usually doesn't cost more than a brand new bicycle.  This approach of course doesn't always work; trying to turn a mountain bike into a road bike and vice versa simply won't yield results as good as starting from scratch.  But, if something like raising or swapping out handlebars, or getting different tires, can zero in on what someone wants out of their bike, I am always happy to open that option up to them.
     The older man didn't seem opposed to the idea, so I went into my usual spiel, in which a main part is me explaining that I love old bicycles and that I prefer to keep old bikes on the road rather than add new bikes to the pavement and trails.  There's a few reasons for this, and one I often list is that it conserves resources, as we aren't throwing away a potentially (or perfectly) functional bike for a brand new hunk of aluminum, steel and rubber, which is probably of lesser quality than what the person has already.  When I say this, a big smirk creeps across his face.  I notice a large, silver revolver stuck into a holster on the back of his belt.  His black ball cap has the word "VETERAN" stitched in gold thread across the front.
     "How veeeeery green of you!"
     I'm sort of shocked by both the comment and the amount of venom in his tone.  It insults me, which is odd as I agree with environmental issues, at least in philosophy.  Mentally quick on my feet, and angered at his statement, I explain that both of my grandpas grew up in the Great Depression and they both hold onto things.  They keep old things running and try to conserve what they use, because it is expensive to do otherwise and just unethical to waste.
     His tone softens and he agrees that he doesn't like to throw things away.  We ended up reaching a compromise, although I think he still thought of me as some kind of "environmental hippie."


     As the day wore on, this event bothered me.  It bothered me that the current mindset of a lot of people is to go out and buy buy buy.  Has the consumerism that has run rampant since the 1980's finally snuffed out older American values, such as conservation and making do with what is given to us?  Are these ideas now branded as controversial, left-wing and liberal by those who may have at one time embraced them?
     Although I am only twenty-three at this very moment, and not that old at all, I was brought up to not waste things.  My family didn't have a "clean your plate" rule at the dinner table, but I know from experience that what my mom made for dinner was what we ate, end of story.  My dad did almost everything that had to be fixed or built by himself, which saved the family a lot of money.  Even on TV shows which either praise or lampoon traditional American values, you get phrases like "We can't do that, it's wasteful".
     Now we have the Kardashians.  Now we are living in a time where America is more interested in celebrity drama than NASA.  Kids aspire to be professional athletes, and rockstars, but go to college to be lawyers and doctors.  The handy-man is seen as a lovable tramp, a low-life necessity in this world of things that move and go, and breakdown.  It is difficult to find something that is repairable in a store.  A broken lamp is sitting behind me right now because there is no way for me to open it up without damaging it, to try and figure out why it won't turn on.  It is destined for Goodwill.  When something breaks, buy a new one.  I'm guilty of it just as much as the next person.  But it feels wrong, and when I think about it, I don't agree with it.  I wasn't raised this way!  So why am I acting like this?
     I guess my point is that by branding the same idea as a core value carried by those who lived through the Great Depression, I was able to shatter the anti-environmental, anti-"green" connotation that immediately soured the gun-toting Texan.  Hemp-sandaled politics suddenly morphed into the creed of our fathers and grandfathers.  Why did we forget these values?  What happened?

Tuesday, February 12, 2013

Take a Moment

     The idea for this post started off being centered on bicycles, of course, but as the notion brewed in my mind it sort of grew to encompass, well, everything.

     Have you ever stopped to consider the technology around you?  No, I don't mean computers, cell phones and other high tech gizmos of the modern age.  Those don't count.  I mean the little things that make civilized life possible.  I'm talking about ballpoint pens.  Corrugated cardboard.  Pneumatic tires.  Have you ever wondered where these simple things that we take for granted come from?  Have you ever wondered who came up with them?  Because that is how they came to be:  they were someone's idea.  More than likely, it was a single person's idea.  At some point, someone realized there was a way to solve a problem or make something easier; there was a way to write with ink more easily, a way to make cardboard significantly stronger, a way to take the bump and jostle out of road.  That idea was realized, and granted it was improved and built upon for the decades to come, and likely will continue to be improved in the future, but ultimately that idea came out of seemingly nowhere.

     It's so easy to take these things for granted today.  It seems everything is comprised of hundreds if not thousands of tiny, specific parts, all different ideas that came at different times to ultimately come together into one item.  The bicycle is a great example of that.  Did you think that some day, some guy got a bright idea and hammered together a fully geared, chain driven bicycle with pneumatic rubber tires on laced wheels that stopped with caliper brakes, and that this idea came out of nowhere?  I'll give you a hint, it didn't.  Before pneumatic tires there were solid rubber tires, and before that there were simple wooden wheels, much like those found on a horse-drawn wagon.  Having multiple gears on a bike was an idea that came sometime in the early part of the 20th century, and it was a notion that was met with great resistance at first.  In fact, the very idea of a chain driven bicycle, something that might seem so simple and obvious to us today, was an idea that came about decades after the first velocipede was created.  Before chains, the crank was mounted directly to the front wheel.  The iconic "penny-farthing" was a great example of this, and you might be surprised to learn that it was very difficult to ride.

Left:  Example of a "penny-farthing".  Could you imagine trying to ride one?
Right:  Example of a safety bicycle.  It may seem like common sense,
but this was at one time a huge technological breakthrough.
Source
     Fed up with the difficulty associated with riding the beast, the safety bicycle, the forefather of the modern bicycle, was invented in 1876.  This significantly easier to ride vehicle led directly to the infamous "bicycle boom" of the 1890's, which would foster several technological achievements that we definitely take for granted today, pneumatic tires and road building standards being just a few.  A lot of the technology that helped make the automobile not only possible, but also practical, was already "discovered" thanks to the bicycle.

     In our superficial, consumerist society it's easy to get caught up with what things look like on the outside.  But every once in a while, take a moment to think about what's inside, and what it took to create whatever is powering your high tech cell phone, or low tech ballpoint pen.

Friday, January 25, 2013

Fuji-san, Part 3

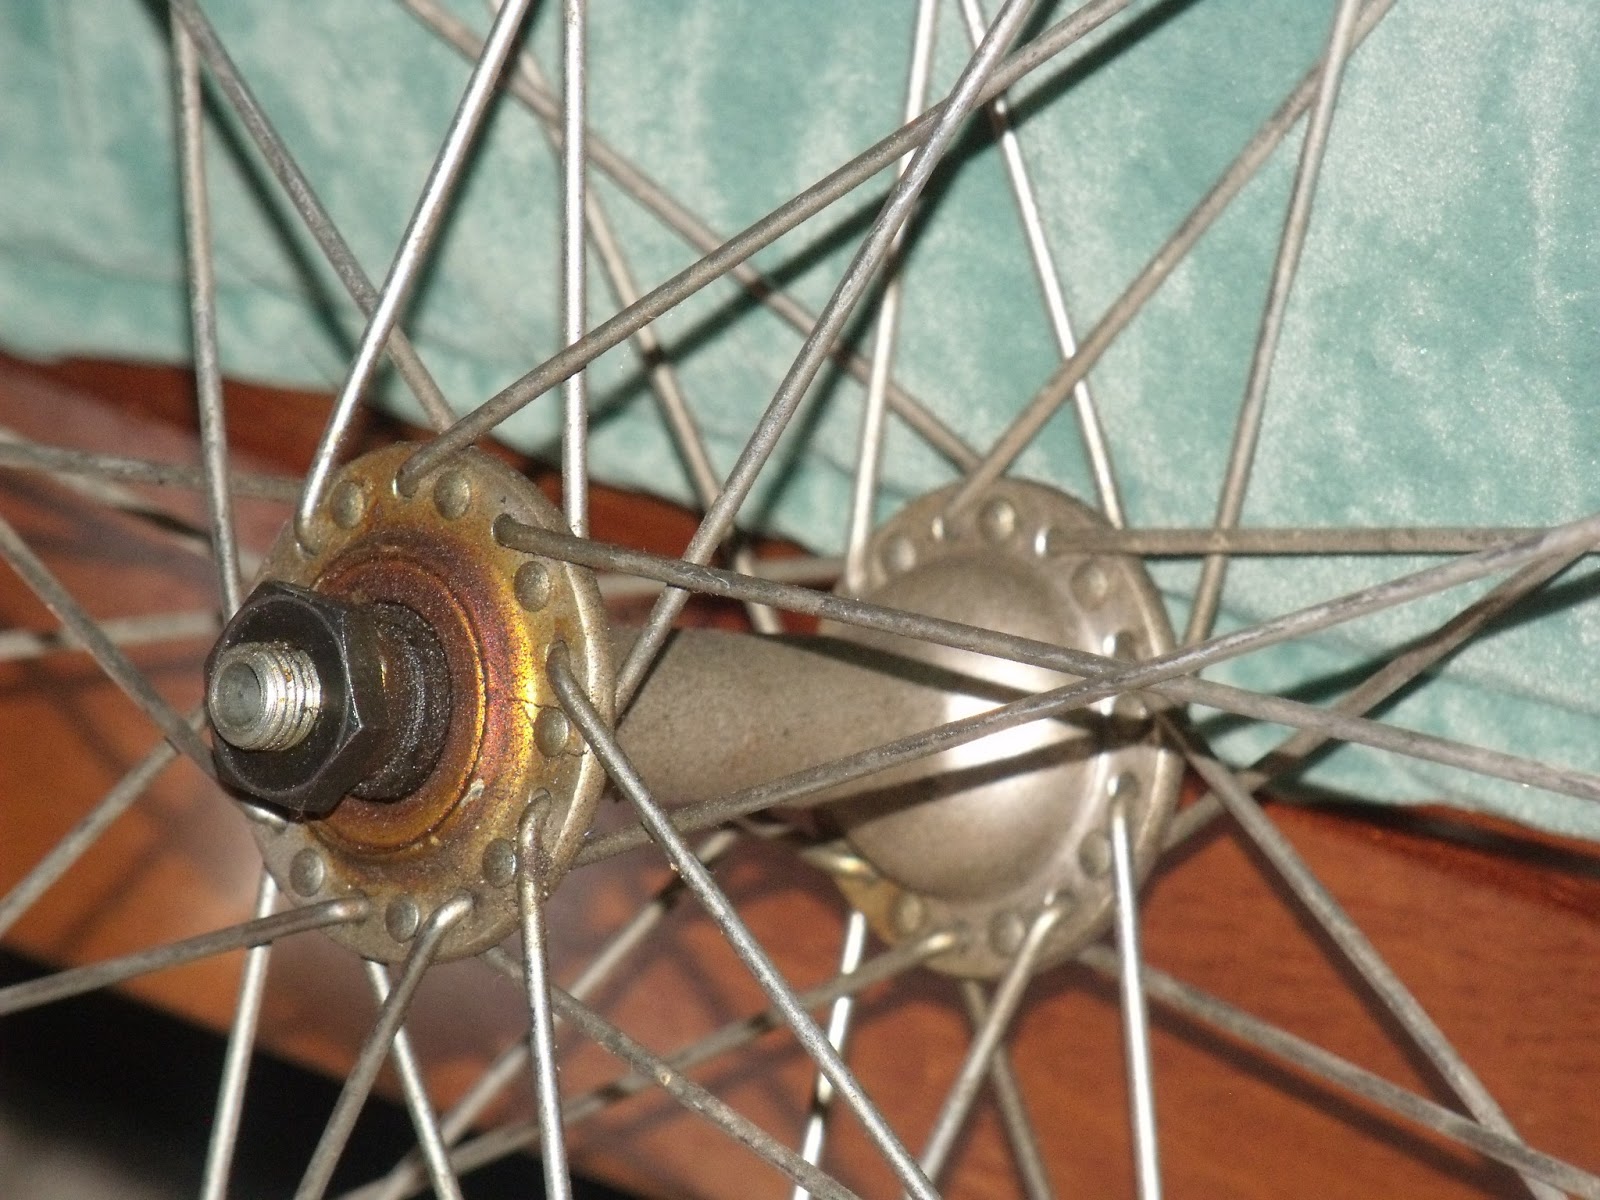
Dirty hub, pre-cleaning, right after the axle was removed.
January 18, 2013
     Although it will be a little while before I can accumulate enough funds to build the wheels I have planned for my Fuji, I can still enjoy the process of prepping what I do have--the hubs--so that when the money is ready I can start quickly.  I also figure this will be a good place to go deeper into hubs, as I sort of glazed over that step in my previous post about my first solo wheel build.

     I have an odd affinity for hubs.  They hold a strange place in the bicycle mythos.  They are important, yet often overlooked; they are very utilitarian yet can be very beautiful.  I already mentioned my tastes in hubs in the previous post, but I'll recount it here.  I love old hubs, especially hubs with high flanges and bold curves.  The more narrow the hub shell, and higher the flange, the more I'll probably like the hub.  A gentle concave curve connecting the two seals the deal.

Hub diagram.  Hand drawn.
January 19, 2013
     In addition to enjoying their aesthetic, I also enjoy working on hubs.  Overhauling a hub is something I almost always enjoy, especially if the hub starts off being very nasty and dirty.  I love taking out the axle, reading the story the bearings may or may not tell, cleaning everything, and putting it all back together into a clean, smooth state of operation again.  It can be very fulfilling.  One of the first things that was handed to me as a fresh and learning bike mechanic was a wheel with a loose hub.  My manager explained the process of adjustment, and handed it to me.  I probably sat with that wheel in my lap, constantly tightening and loosening the cones and locknuts, for about an hour.  Frustrated, I handed the wheel to my manager and asked if it was acceptable.  Without saying anything, he loosened the locknuts, hand tightened the cones and gave it back to me.  "Like this," he said.  It was buttery smooth and had no play, or side-to-side wobble.  Of course it had to be tightened (that is the tricky part), but I was irritated that I was struggling so much with something apparently so simple.  I remember making some comment about taking an example home to practice so that I could get the procedure down, and my manager firmly responded that I was not paid enough to ever "take anything home."  And so I never did.

     Ah, but to those who aren't familiar with the inner workings of bicycle brackets, some of the above terms such as cone and locknut probably didn't make a ton of sense.  I'll explain.  A bicycle bracket--the hub on each wheel, the headset, and the bottom bracket--is essentially a bearing assembly that allows an axle or spindle to spin.  The hubs let your wheels roll along the ground, the headset lets you turn your handlebars, and the bottom bracket lets you turn the crank when you pedal.  Although they are each a little different (the headset usually being the most different) they all operate on the same principles and share the same parts, in concept.  I'll explain in the context of a hub, as the terminology does change a little depending on which bracket you're dealing with.

Inner Hub Diagram.  Hand Drawn.
January 23, 2013
     On each end of the hub you have an inward-facing cup, where a ring of bearings rests.  Running through that ring of bearings will be your axle, which towards each end will have a cone:  in essence a nut with a concave machined surface on the outward rim, which allows the axle to roll on the bearings.  Behind the cone you can sometimes have a washer, spacer, or two, and then finally a locknut, which is tightened to lock the whole assembly together.

The axle, bearings, and hardware from my hub, pre-cleaning.  I regretfully
forgot to photograph the disassembled parts after their cleaning, but this will
do to show some real life examples.  Note the concave surfaces on the cones, and the
washer-spacer combo between the locknut and cone.
January 18, 2013
     A properly adjusted hub will allow the axle to spin freely and fluidly, yet have absolutely no play.  A loosely adjusted hub will definitely allow the axle to spin freely, but you'll be able to move the axle side-to-side and maybe even up and down within the assembly.  This means that there is space between the bearings and either the cup or the concave surface of the cone.  As you ride on a loosely adjusted hub, that play will deform the cup and cone surfaces so that they are no longer smooth, and may even deform the precise concave curve necessary for the bearings to roll.  Give it enough time, and you can even deform the bearings, turning them into misshapen little lumps of steel.  A hub that is adjusted too tight will make it difficult to turn the axle, and over time the same damage can occur--rough surfaces and disfigured bearings.  Properly adjusted hubs--in addition to all your brackets--are a very important yet often overlooked form of bicycle maintenance that needs to be kept up on.

Close up of the stamped lettering.  Note the 6 and 80, which I believe designates the
hub being made in June of 1980.
January 23, 2013
     Now, onto my hub.  The 1980 Fuji S12-S came stock with a pair of SunShine Gyro-Master hubs.  Interestingly, a Google search on any information on these hubs tends to only bring up sealed bearing BMX hubs from the mid '80's.  Indeed, I've never come across any SunShine hubs as a mechanic, at least any that I've noticed.  Regardless, I think they are very pretty and I rather enjoy the look of mine.  I noticed something interesting on my hubs.  Beneath the SunShine logo, "6 80" is stamped into the aluminum.  The "6" looks obviously stamped at a different time from the "80", and both numbers appear to not quite line up with the rest of the lettering.  I know the frame of my Fuji was made in July of 1980.  I would wager this stamp means the hub was made in June of 1980.  I love that I can pinpoint when the parts of my bike were actually manufactured!

SunShine Gyro-Master front hub, still laced to the original rim and uncleaned.  Note the nasty, dried
grease on and around the dust cover.
January 18, 2013
     The hubs, and indeed the whole wheels, that accompany the bike came to me very dirty, with old gritty grease and corrosion covering much of the hub surface.  I was anxious to see how much, if any, shine was beneath all of the grime.  After unlacing the wheel, I took the bare hub and disassembled the inner workings on my kitchen floor.  The very top picture of this post shows what it looked like after I opened it up:  nasty, reddish brown grease, one of my least favorites to find.  I hand cleaned everything the best I could with paper towels, and took the parts into work with me the next day to use our parts cleaner.  As I've mentioned in a few previous posts, we have an ultrasonic parts cleaner where I work at REI, and that does a pretty good job of getting a lot of that old, dried grime off.  I popped my parts in with a coworker who was cleaning some of his own parts (a disassembled crank), and after a few bouts everything came out looking very good.  There was shine underneath all of that dirt!

Left:  Hub shell before cleaning and polishing.  January 18, 2013
Right:  Hub shell after cleaning and polishing.  Wow!  January 25, 2013
     A lot, if not most or all, of the high powers of bicycle knowledge out there will tell you to never reuse the original bearings if you're overhauling a hub, or any bracket for that matter.  This is, in all truth, sound knowledge, as bearings can lose their integrity and roundness over time.  However, some of the first bicycle work I ever did involved me and my dad overhauling the headset on my newly acquired Cannondale SR500.  I remember my dad telling me that you were to always inspect the bearing surface for any cracks, dents, or other marring   Looking through a magnified eyepiece--much like the stereotypical jeweler appraising a fine gem--I remember he and I looking at the tiny bearings that came out of my headset.  We determined they were fine enough to reuse, and they are the bearings that are still in there today.  I'm not allowed to--and I don't--reuse bearings at my job now at REI, but I have no problem doing that for myself.  Small, silly traditions are helpful for keeping connections alive inside of our souls.

Left:  Outside of hub assembly before cleaning.  January 18, 2013
Right:  Outside of hub assembly after cleaning.  Shiny!  January 25, 2013
     One night I sat down at my computer desk to reassemble the hub.  I had my newly cleaned parts, the original bearings (which looked great by the way), and all of the appropriate tools, including one of my precious tubes of Phil Waterproof Grease.  A few words on grease:  it's important.  Way more important, in my opinion, than the lube which goes on your chain and cables.  That stuff will eventually come off, be it from wind, water, or time.  It's natural.  Grease stays inside of your bike for a long time, and helps it perform it's most basic bicycle functions:  turning, pedaling, and rolling along the ground.  Personally, I've only ever used two of the products out there:  Phil Waterproof Grease, and Park Tool's Poly-Lube Grease.  Between the two, I much prefer Phil's grease.  It's thicker, and heavier, and easier to use in my opinion.  The Park Tool grease is slimier and thinner feeling.  It feels cheap.  I nabbed a few tubes of Phil Waterproof Grease before I left Indiana.  I got these tubes in a slightly amusing manner.

     While working at Ike's Bikes in Richmond, Indiana, my first job as a bike mechanic, we got a call one day that an older store that used to sell bicycle equipment was wanting to give us all of their old new stock.  The store mentioned was Veach's, a name that should spark quiet excitement in most anyone raised in Richmond from the past several decades.  A very old store, Veach's is mostly loved and revered as an "old fashioned" toy store, one where you can find figurines, dolls, model kits and other more "wholesome" play-things.  Early in my own life, the toys were still in the basement of the store, while the first floor housed an assortment of odds and ends.  There was always great excitement when we would visit Veach's with my grandparents, and one of my earliest memories is standing in the basement of that store getting a birthday present.  Sometime during my early childhood, the store dropped the "five and dime store" act on the ground floor and became a  full-blown toy store, which is what it still is today.  At some point I guess they sold bike parts and accessories, maybe even a few bikes.  They ended up giving us all of the stuff they never managed to sell, most of it coming from the late '80's or early '90's if I had to guess.  A lot of it was relatively useless, out-of-date and cheap crap.  But some of it was still useful, and each of us three mechanics divvied up the tubes of Phil grease for our own personal stashes.  I got three tubes out of it, which should last me a good while.

Left:  Preparing to assemble the second and last bearing assembly.
Top Right:  Phil Waterproof Grease, still with the Veach's price tag for
$2.00 (it retails for about $10 now)
Middle Right:  Greased cups, ready for bearings.
Bottom Right:  Bearings resting in the greased cup, ready for the axle and cone to be
installed.  Note the ring they form in the cup.
All taken January 23, 2013
     I spread the grease on the inside of one of the cups with my finger, leaving a thin but substantial layer.  Then, I placed half of the bearings, nine of them, in a ring around the cup.  The thick, sticky qualities of Phil Waterproof Grease doesn't make this hard to do.  I then spread another thin layer of grease on top of the bearings, and gently coated the concave surface of the cone; the part that would contact the bearing surfaces.  The cone itself was tightened against the locknut and spacers on the axle, ready to interface with the bearings.  After I popped the dustcap into place--a thin, lipped ring of metal that protects the grease inside from, you guessed it, dust and dirt--I slid the axle-cone assembly in, and flipped the hub around.  One side was done.

     Now, normally I'm doing this to a hub that is laced to a wheel, so when I flip the hub around, I can rest the axle on a surface, and the wheel can lean slightly to one side while I wrap up the job on the unfinished side.  Doing this kind of work to a lone hub is actually kind of an awkward process, but I managed to carefully balance the hub on the axle.  Probably not the smartest option, but it was kind of cool and worked out for me.  At this point I basically repeated the steps on this side of the hub, and sealed the deal with the cone, spacer, washer, and locknut.  Now comes the adjustment.

     As explained above, hub adjustment is important.  It can also be a bit tricky.  Hand tightening the cones to the proper positions isn't that hard, it's the procedure of tightening them against the locknuts that almost always screws up the adjustment.  This happens because as you secure the cone, and turn the locknut to tighten the assembly, the axle virtually always spins with it, at least a little bit, thus eliminating the position your cone was in.  There's two ways to deal with this, and honestly one way is the "right" way, and one way is the "not-so-right" way.

     The "right" way, which I do at work, involves an axle vise.  This is a special tool inserted into a vice, which allows you to clamp onto an axle without damaging the threads.  With the axle secure, you can then make your adjustment and tighten the assembly without fear of the cone position changing.  It is still a little tricky, as I find the position awkward, but it does usually make it a lot easier.  The "not-so-right" way, which I learned in Indiana and use on my own bikes, is to actually over-tighten the cone first, so that then when you tighten it against the locknut and the axle turns too, you are actually loosening it to (hopefully) an adequate adjustment.  It doesn't always work, and can be frustrating to find that proper amount of over-tightness.  But it works well when you don't have an axle vise.  If there is still just a hair of play in the adjustment, another trick is to secure the first locknut, and then tighten the second.  Again, it is a bit of a messy fix, but you are essentially compressing the whole assembly at that point.  This way you can nudge the cones together without starting over again.  These "not-so-right" procedures are what I did to my hub here.

The inked lettering.  The "r" in "master" would not hold the ink, it is a shallow letter.
Probably a sign of the less-than-highest quality of the hubs.
January 25, 2013
     The final step is purely a cosmetic one, and a trick that I learned from a coworker who also has a fondness for old bicycle parts.  He showed me how you can use a Sharpie to ink the stamped lettering on old parts, and then use rubbing alcohol to wipe away the excess, leaving the black ink in the recessed letters.  It really helps the lettering pop and be readable.  The "r" and part of the "e" in "master" were difficult to keep the ink in, due to the recessed lines being very shallow.  More than likely this was because the stamp for "GYRO-master" did not firmly press into the right side, no doubt a sign of how these hubs aren't the highest quality parts out there.  No matter to me, I think it looks great.

     With all of that said and done, the hub is now ready to be measured to determine spoke length for the future wheel build.  It won't be the next wheel I build, I am going to build a rear wheel for Keri's bike, but it will probably come after that.  I can't wait.

Another close up of the inked lettering.  I love how the "R" snakes below the "O".
January 25, 2013
Note:  As you may have noticed, I provided two illustrations to demonstrate mechanical diagrams that would have been otherwise difficult or impossible to photograph myself.  Wanting to keep as much material original as possible on my blog, and to also stretch my lazy drawing muscle, I found this to be a fun alternative.  If you liked the drawings, or would prefer less-crappy diagrams from a professional source, let me know in the comments.  I'm anxious to hear some input.

Monday, January 14, 2013

Keri's Motobecane, Part 2

     There isn't much in the bicycle mythos that is more worshiped or revered than the bicycle wheel.  Specifically, the traditional bicycle wheel, if you want to retain the mystical connotation.  It is an under-appreciated wonder of engineering, and represents a perfect combination of simplicity, elegance, and good design.  There's a lot to be said about the bicycle wheel, and this isn't a place where you'll hear a lot of it.  If I were to go into a more in-depth explanation of what goes into a bicycle wheel, this would be a very long and probably somewhat boring post.  Instead, I'm just going to recount my experience of my first completely solo wheel build, with nuggets of vital information.

Starting the wheel building process.  January 9, 2013
     I say completely solo because I had help on my first wheel build ever.  A coworker in Indiana helped me plan and build a wheelset for a very awesome Schwinn racing bike from the 1970's that I briefly owned.  He essentially walked me through the process of lacing the wheel, and then he wrapped it up by tensioning the spokes.  We only did this for the rear wheel, for I attempted to solo the front wheel but couldn't figure out how to start the lacing.  Looking back, I blame his desire to uphold a common signature of wheel building:  lining up any sort of logo on the hub with the valve stem hole.  It's a little tricky as typically a hub gets turned during the lacing process.  He ended up building that wheel for me.

     Since then I hadn't tried to build any wheels.  The need, or funds, never really came up.  That began to change as our bicycles re-entered our lives after moving to Tucson, Arizona.  In particular I was needing to build a set of wheels for my fiancee Keri's Motobecane.  We got her bike with the stock wheels, sporting beautiful high flange hubs and--gulp--single-walled rims.  Interestingly enough, the front rim is aluminum, and the rear is steel.  The hubs are the same, so that leads me to believe they are the original wheels.  Not sure what is going on with that.

     But the problem, besides the fact that Keri was riding on inferior, ready-to-bust wheels, was that she kept getting flats.  A ridiculous number of flats.  As a mechanic, who has to change numerous tubes a day, I am typically pretty unsympathetic about this sort of thing.  Getting a flat is part of riding a bike, plain and simple.  But Keri was having serious trouble, especially from her rims.  Now, a bit of bicycle knowledge.

     Between single-walled rims and double-walled rims, there is no contest.  Single-walled rims are significantly weaker, more prone to going out of true, and their only positive quality is that they are the cheaper alternative.  Double-walled rims are more or less the norm on any bike past the $500 mark, and as my former manager would always say, "No bike mechanic would build himself a wheel without a double-walled rim."  They are much stronger, add very little weight, and the price jump is honestly not that bad.  What you gain in integrity far outpaces the price jump.

Left:  Single-walled rim.  Note the upside-down U shape of the rim.  Source
Right:  Double-walled rim.  Note the second wall, adding a dramatic amount of strength.  Source
     Rim tape, which is used on double-walled rims to protect the tube from blowing out on the milled nipple holes, is tougher than rim strips, which are essentially giant rubber bands.  The rubber rim strips were not covering up all of the little holes that tend to line the inside edges of steel rims either, and I am certain those were causing trouble for her too.  So, I decided to kill two birds with one stone and work on upgrading her wheels entirely.

     One of my greatest hang ups when picking out components for a wheel is the hub.  I have a great affection for vintage hub designs, specifically high flanges and narrow hub shell.  Some of the most beautiful hubs, in my opinion, have a deep yet gentle concave profile.  They're hard to come by, and nowadays they only exist as track hubs, although I'll admit I don't find many modern track hubs very keen to look at.  More typical road hubs simply don't follow the aesthetic of their predecessors, they tend to have low flanges and thick hub shells, with hard angles connecting the two.  Not there is anything specifically wrong with this style, I just prefer the older look.  I've spent a lot of time looking at hubs, trying to find ones I liked.  Then one day, I realized how silly I was being.  I could just use the hubs that came with her bike!

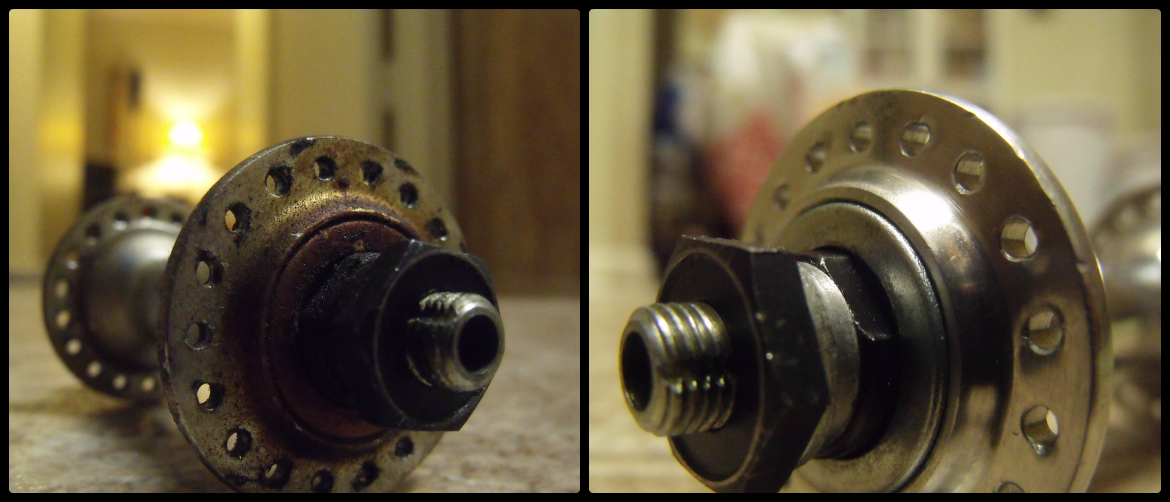
Left:  Nasty side shot of the hub.
Right:  Stamped name on the hub shell, reads "NORMANDY FRANCE".
Both taken November 29, 2012
     They are, from the best that I can tell, the stock hubs that would have come on the bike.  Normandy hubs, made in France.  Aluminum, thirty-six holes and overall a nice design.  Not my favorite, but a nice look.  They resemble a pair of Campagnolo hubs I have laced to a set of vintage wheels hanging on my wall. I started by unlacing the front wheel.  After that, I took the hub in with me to work and disassembled it to clean and repack everything.  I have an ultrasonic parts cleaner at my disposal there, and that did a good job of removing a lot of the grim and crud.  A lot of the tarnish still persisted, however, so I had to use another trick.  A Google search unveiled a relatively simple procedure using Brillo pads and elbow grease to clean up aluminium.  Filling the kitchen sink with warm water, I scrubbed away.  All-in-all it worked rather well, considering I only spent a few bucks on a box full of Brillo pads.  The site that offered the Brillo trick also suggested rubbing a ball of aluminium foil onto the object to shine it up, but this did not yield any favorable results for me.  This is probably because there aren't many flat surfaces on the hub.  But maybe I was just doing it wrong.

Look at how shiny and clean it turned out!  Note:  The golden yellow tone
comes from the poor lighting of my living room.  December 1, 2012
     While disassembling the hub, I accidentally botched up the axle.  Old axles tend to have a shallow groove cut along the length of the axle, for keyed washers that lie between the cone and lock nut.  The same thing tends to exist more commonly on threaded headsets.  And just like on the threaded headsets, these keyed washers tend to turn in place and lodge their key in the threads.  If you're careful you can usually work the washer back to where the key lines up with the key slot, but if you're not careful you can booger up the threads.  This is what I ended up doing to the original axle.  I decided on replacing it with a modern axle, which isn't that big of a deal.  There isn't much that is special about axles, at least to me.

     With the hub finished up, I was able to make all of the necessary measurements to calculate spoke length.  There is some fancy math you can use to do this (I don't know it) but nowadays there are a plethora of online spoke length calculators.  I used the United Bicycle Institute's calculator.  296mm spokes were what came out for me, for a three-cross front wheel.  Time for some more explanation.

An example of a spoke on a three cross wheel.  Each arrow points to a
point where the highlighted spoke is crossing another spoke.  January 14, 2013
     The lacing of the spokes of a bicycle wheel is just one of the several ways to categorize wheels.  The United Bicycle Institute's calculator goes up to five-cross, so I guess you can say you can go from zero to five.  The term " # cross" signifies how many other spokes a single spoke will bisect.  On a three-cross wheel, every spoke crosses three other spokes.  On a four-cross wheel, every spoke crosses four other spokes.  This design is a simple yet extremely effective way of building strength--through tangents, much like a truss bridge--into a bicycle wheel in a lightweight manner.  Typically the more spokes a single spoke crosses, the stronger the wheel.  This adds weight of course (due to longer spokes) but the increase in weight is not a tremendous thing.  Three-cross wheels are considered the "norm", although this is slowly disappearing.  I chose to lace Keri's wheel in three-cross mostly because I've found they are easy to replace spokes in.  I've had to replace spokes in four-cross wheels and I found it frustrating sliding the spoke into place.

     The spokes I used were cheaper, relatively simple spokes.  The problem is that spokes can be very expensive, and can be just as "high tech" as the hubs or rims.  I went with Wheel Master straight gauge stainless steel spokes.  A box of seventy-five spokes retails for $30, and although I don't need seventy-five, it ended up being my cheapest option.  For a little more money, I could have gone with some DT Swiss double-butted spokes, which would be stronger and lighter, but it would have been a hassle.  I figure this wheel will be a good preliminary build for Keri, if she gets more serious we can bust out the big bucks when the time comes.

     The final component is the rim, and an important one it is!  There aren't many 27" rim options out there anymore.  The only two viable options I had were Sun or Weinmann rims.  I decided to stay away from Weinmann.  They don't really make a bad product but they are sort of synonymous with cheap in wheels.  Sun, on the other hand, makes some nice yet affordable rims, and I've actually had experience with them.  I own a pair of pre-built wheels with Sun M-13II rims that are currently on my Fuji or Cannondale (I have to swap between bikes depending on what I want to ride.)  They look great and have held up well for over a year now.  I could have gotten another M-13II rim but I figured I already know how it holds up, so I'll experiment and try the Sun CR-18.  It is a little more wide but also appears to be a little more sturdy.  In addition, the 27" CR-18 comes polished.  Pretty!

A Christmas gift from Keri, which I used to build her wheel!  Source
     With all of the parts finally in my possession, I could begin the wheel building process.  Luckily I had just received the book "Zinn & the Art of Road Bike Maintenance" from Keri for Christmas, and it has a step-by-step procedure for building a three-cross wheel.  I then proceeded to sit on my living room floor and anxiously began the lacing process.

Beginning of the lacing process.  Sun CR-18 rim, Zinn's book, Normandy hub,
36 nipples and spokes, spoke wrench and slotted screwdriver.  January 9, 2013
     I won't go into any real detail on the lacing process, as it would balloon the size of the post and isn't that relevant.  To sum it up, I began by lacing half of the spokes for one flange to the rim, and then laced half of the spokes for the opposite flange.

A quarter of the spokes laced, another quarter ready to be laced.  January 9, 2013
     Then I spun the hub as far as I could and began truly lacing the third quarter of spokes.  I say truly because it was at this point that I started crossing spokes and, in a sense, weaving them to create a strong wheel.  After the last two quarters of spokes were done, I had an untensioned, yet fully laced, bicycle wheel.  What an accomplishment it felt like!  But the hardest part was about to happen, the tensioning.

Three quarters of the spokes are laced.  Note how it is beginning to
resemble a normal wheel.  January 9, 2013
     Naturally, after lacing a wheel you have to bring all of the spokes up to proper tension.  A poorly tensioned wheel won't last as long as a properly done one, and tensioning can be a tricky process.  I did some preliminary tensioning at home, by tightening every spoke until I knew I was in the ball-park.  But I had to eventually take it into work with me to use a proper truing stand.  I attempted to use a bike and it's fork flipped upside down, but that only helped me get into the ballpark.  It didn't quite provide me with the precision I was needing.  In addition to tensioning the spokes I have to of course maintain lateral trueness--that's the elimination of side-to-side wobble--and radial trueness--making sure the rim is a perfect circle and not lopsided.  There is also the dish of the wheel to consider, which essentially means whether or not the rim is in the center of the fork or frame when the wheel is mounted.  Balancing all of these attributes while making sure the spokes are at a proper tension can be harrowing on the mind, especially when dealing with thirty-six of them!  Eventually I managed to get the wheel within sufficient tolerances.  No wheel is truly perfect, simply because there are too many elements pushing and pulling against others.  You could make a perfectly true wheel, but it may not be uniformly tensioned.  Likewise, a uniformly tensioned wheel more than likely wouldn't be perfectly true.  You have to reach a state of balance between all of these parameters in order to build a good wheel.  There is some serious Taoism going on in wheel building.

Finished wheel.  Note the rings of reflected light on the
floor and walls.  Shiny!  January 14, 2013
     With the wheel ready, I applied the rim tape, installed the tire and tube, and mounted the wheel in the Motobecane's fork.  Needless to say, it all looks great.  Can't wait to start on the rear wheel.

Final product.  January 14, 2013